
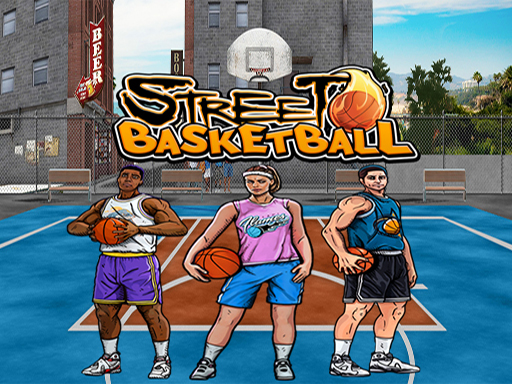


Racing Ball Master 3D
Best Games
View moreArcade Games
View moreRacing Games
View moreCreating 3D Games with HTML5 and WebGL
In recent years, the gaming industry has rapidly evolved, with advancements in technology enabling more immersive and interactive gaming experiences. HTML5 and WebGL have made it possible to create 3D games directly in web browsers without the need for third-party plugins or extensive software installations. This democratization of game development allows anyone with the right skills to create powerful, visually stunning 3D games using nothing but the browser.
WebGL (Web Graphics Library) is a JavaScript API that provides a way to render 3D graphics within a web browser, using the capabilities of the user's GPU (Graphics Processing Unit). It is built on top of OpenGL ES (Open Graphics Library for Embedded Systems), and it allows developers to create high-performance 3D graphics for games, simulations, and visualizations. Combined with HTML5 and JavaScript, WebGL offers a robust platform for creating interactive 3D content without relying on external tools or plugins like Adobe Flash or Unity Web Player.
In this article, we will explore how to create 3D games using HTML5 and WebGL. We will cover the essentials, such as setting up WebGL, understanding its core principles, and designing a simple 3D game from scratch. Along the way, we will look at best practices, libraries, and techniques to optimize your 3D games for performance and cross-platform compatibility.
Before diving into the game development process, it's important to understand the fundamentals of WebGL and how it interfaces with the browser's rendering engine.
WebGL is a low-level JavaScript API that provides direct access to the GPU (Graphics Processing Unit) for rendering 3D graphics within a web browser. It allows developers to interact with the hardware directly, enabling high-performance rendering and advanced visual effects without the need for plugins or additional software.
WebGL uses shaders written in GLSL (OpenGL Shading Language) to manage graphical operations like vertex transformation, fragment coloring, and texture mapping. These shaders are executed on the GPU, allowing for fast and efficient graphics processing. Since WebGL is based on OpenGL ES, it is designed for embedded systems and mobile devices, making it lightweight and suitable for a variety of platforms.
WebGL integrates seamlessly with HTML5, allowing developers to embed 3D content into HTML pages. To begin working with WebGL, developers need to create a canvas element in HTML, which will serve as the drawing surface for the 3D graphics. Once the canvas is in place, the WebGL API can be accessed through JavaScript.
When rendering 3D content, WebGL takes care of creating the necessary buffers, compiling shaders, and rendering objects in real-time. The API interacts with the GPU to perform tasks such as texture mapping, lighting, and geometry rendering, making it possible to create visually complex scenes with minimal CPU load.
To start creating 3D games with WebGL, you'll need to set up a development environment. This involves choosing the right tools, libraries, and frameworks to simplify the development process and ensure compatibility across different devices.
While WebGL provides the core functionality for rendering 3D graphics, it can be challenging to work with directly, especially when building more complex games. Fortunately, there are several libraries and frameworks available that can simplify the process.
Three.js: Three.js is one of the most popular libraries for WebGL development. It abstracts away many of the complexities of WebGL, providing a high-level API for rendering 3D objects, textures, lights, and cameras. With Three.js, developers can create complex 3D scenes with just a few lines of code.
Babylon.js: Babylon.js is another powerful 3D engine for creating games and simulations in the browser. It offers a robust set of features, including support for physics, materials, lighting, and sound. Babylon.js also provides an easy-to-use editor for designing 3D worlds and scenes.
PlayCanvas: PlayCanvas is a full-featured game engine built on top of WebGL. It includes a visual editor, asset management system, and a physics engine, making it ideal for creating interactive 3D games with minimal code.
These libraries offer extensive documentation and community support, making it easier to get started with WebGL game development.
To get started with WebGL, you first need to create a canvas element where the 3D graphics will be rendered. You can retrieve the canvas element through JavaScript and create a WebGL context. The WebGL context will allow you to begin rendering 3D objects on the canvas. Once this is set up, you can begin building your 3D game.
In 3D game development, objects exist in a three-dimensional space with coordinates for the X, Y, and Z axes. When working with WebGL, you'll need to understand how to define and manipulate these coordinates to position objects, cameras, and lights within the scene.
WebGL uses a left-handed coordinate system, where:
Each object in a 3D game is defined by its vertices, which are points in 3D space. You can apply transformations to these vertices, such as translation (moving), rotation, and scaling, to position and animate objects in the scene.
Transformation matrices are used to manipulate the position, rotation, and scale of objects. In WebGL, you'll work with several types of transformations:
These transformations are applied using matrix multiplication. A model matrix is created to store the transformations of an object, and this matrix is applied to its vertices during rendering.
The camera defines the viewpoint from which the user views the scene. In a 3D game, you'll need to adjust the camera's position and orientation to create different perspectives and simulate movement through the world. The camera also defines the "view matrix," which determines how the scene is projected onto the 2D screen.
Let's create a simple 3D game prototype that uses WebGL to render a rotating cube. We will apply basic transformations, such as rotation and scaling, and use shaders to control the appearance of the cube.
To create the cube, we need to define its geometry (vertices), create buffers to store the data, and write shaders to render the object.
Once the cube is rendered, you can start adding basic game logic such as player interaction, collision detection, or camera movement. By handling user input (keyboard, mouse, or touch), you can make the cube respond to player commands.
One of the most important aspects of WebGL game development is performance. 3D rendering can be demanding, especially on mobile devices, so optimizing your game for smooth performance is essential.
WebGL performs better when you use efficient data structures for representing 3D objects, such as vertex buffers and index buffers. These buffers store the geometric data of objects, and by minimizing the number of draw calls, you can reduce the processing load on the GPU.
To improve performance, you can use Level of Detail (LOD) techniques, where objects are rendered with fewer polygons when they are far away from the camera. This reduces the workload on the GPU, improving the frame rate.
You can use frustum culling to remove objects outside the camera's view, and occlusion culling to avoid rendering objects hidden behind others. This helps to reduce the number of objects processed by the GPU, improving efficiency.
Once you've mastered the basics of WebGL, you can dive into more advanced features that can enhance your game:
Creating 3D games with HTML5 and WebGL offers an exciting opportunity for developers to build interactive, immersive experiences that run directly in the browser. By understanding the fundamentals of WebGL, using helpful libraries like Three.js and Babylon.js, and optimizing your game for performance, you can create complex 3D games that reach a wide audience on both desktop and mobile devices.
As web technologies continue to evolve, the possibilities for creating web-based 3D games will only expand. Whether you're building a simple 3D prototype or a fully-featured game, HTML5 and WebGL provide a powerful platform for creating visually stunning and interactive experiences without relying on third-party plugins or installations.
With the right tools and techniques, you can bring your creative vision to life and develop 3D games that are both fun to play and easy to access on the web.